
With my boys, we play I Spy everywhere we go. They ~love~ I Spy books, games and toys. I've been wanting to get them a Find-It game for a really long time, but I can't bear to pay the price for one, so I came across a great tutorial on how to create your own I Spy bag for just a fraction of the cost.
WARNING: There is sewing involved. And I am just about the worst sewer on the planet, but I managed to do it and get the results I was looking for. So, if you can sew a straight line, (I truly can't yet), then this is the project for you!
Honestly, after using the tutorial, I found out later that the bags were too big and too heavy for my liking. The next one I make will be smaller. You can do different shapes and sizes.
 Before getting started with the materials list, I should explain what I did for filler.
Filler:
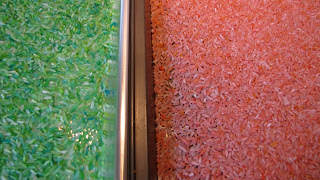
1 Large bag of cheap rice (the cheapest you can find)
Measuring cup to measure 5 cups
1 Large plastic bag
2 tsp vinegar
Food coloring any choice color
Cookie sheet
-Turn oven on to 200ºF.
-Place 5 cups of rice into a plastic bag.
-Add 2 teaspoons of vinegar and a few drops of food coloring.
-Now shake it! Mix up well and spread it out on a cookie sheet.
-Place in oven for 30mins to dry out.
 Directions for the bag:
Materials:
5 cups colored rice
1 piece of fabric (I used fleece)
1 piece of clear vinyl
1 small piece of ribbon
a good mix of assorted little treasures (approx 32 items)
1 3x5 photo of your treasures and trinkets
sewing machine
thread of any color
velcro
 Cut fabric to desired length or shape and fold in half.
-I used the tutorial for a guide. 1
8" x 9" to make an 8" x 8" bag.
-Cut a 3" x 3" square in the center of one half of the fabric.
(Note: my square is certainly not centered. I fixed it after I took this picture. Sorry.)
-Cut small diagonal slits at each corner of your center square and fold back.

-Cut out a piece of vinyl to cover the entire square
and lay it over the open flaps.
-Pin down the vinyl to the fleece.
 -Sew around your window attaching the vinyl and the fleece together.
(I found this step a little difficult to do with my lack of sewing abilities, so I stitched down the flaps first before sewing down the vinyl.) It creates a slightly different look, but still functions the same)
-Place vinyl side down on your sewing machine so that your fabric can move without getting caught into your machine.
 -Cut off excess vinyl to about .5"
-Fold fabric wrong sides together and sew leaving a small hole big enough for your filler and trinkets
-Turn your bag inside out

-Fill your bag with treasures and rice

-Attach one end of the ribbon to your 3x5 photo and laminate.
-Insert other end of ribbon into the hole of the bag and topstitch the hole shut.
-Add velcro to the middle of the backside of your bag and to the backside of the picture card.


No comments:
Post a Comment